Lego F1 3D Printed Frame


Lego F1 3D Printed Frame
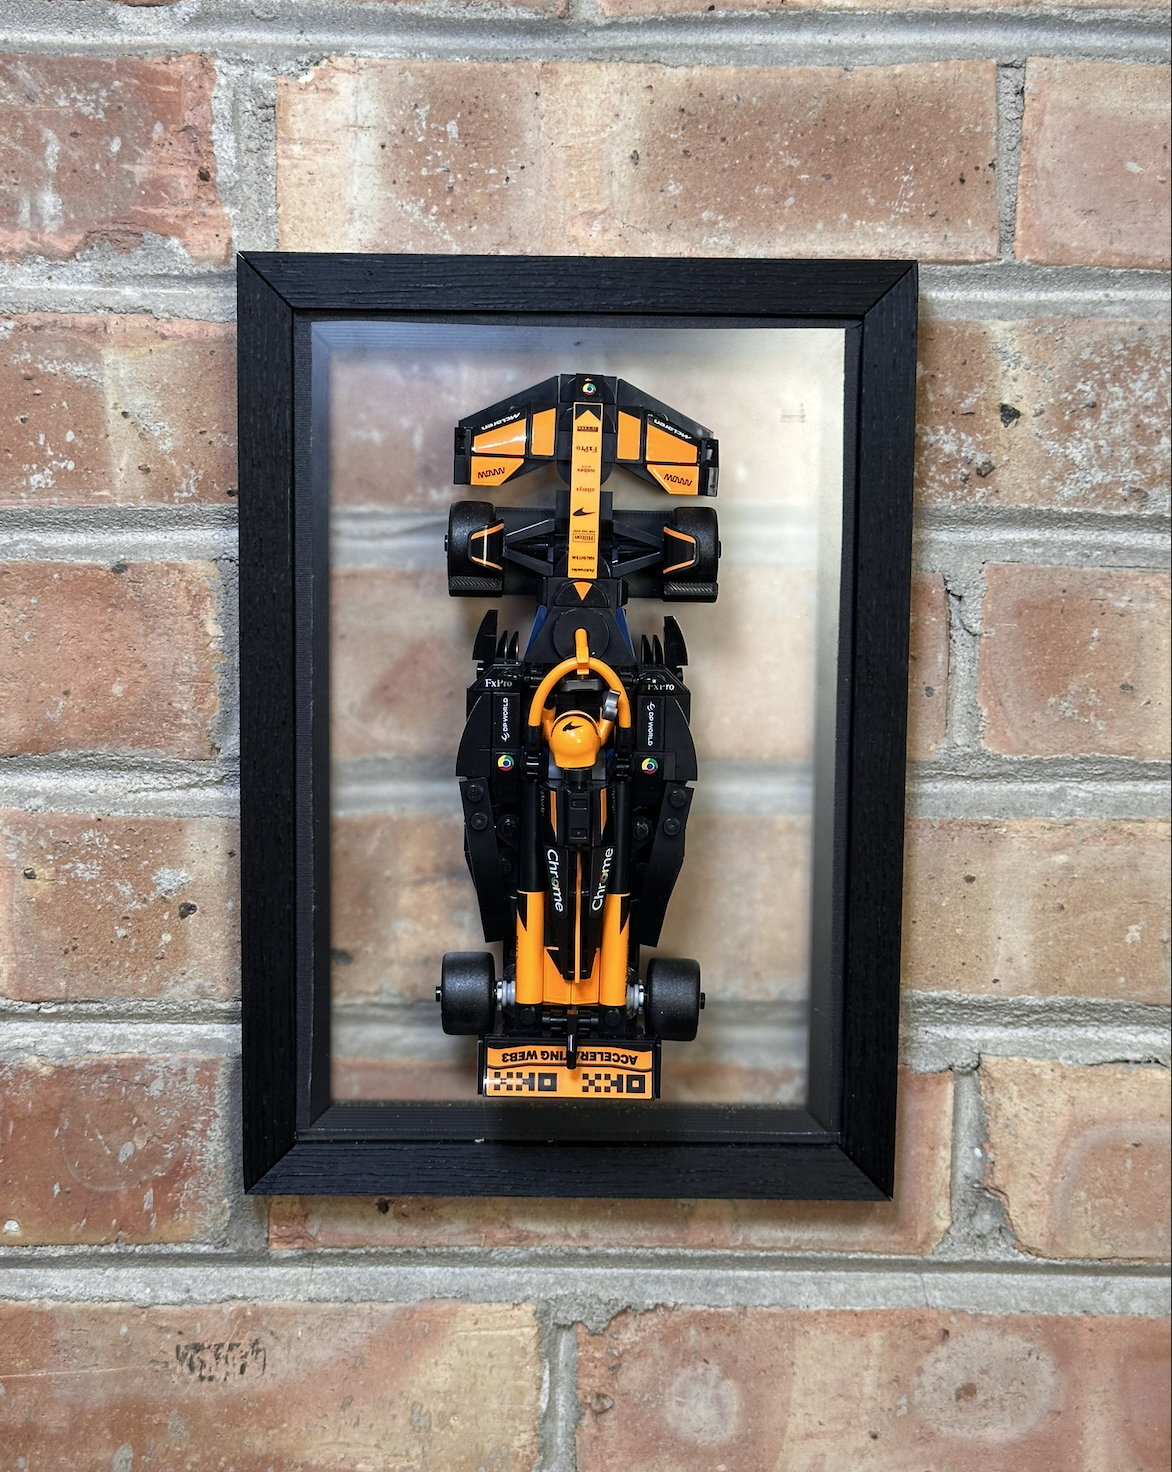
I wanted a cleaner way to display one of LEGO's Formula 1 Speed Champions cars without committing to a permanent wall mount. This combines a 3D printed frame, a simple wall mount, and a matte styrene backer into a display that feels more like framed artwork than another shelf decoration.
Disclaimer: If you're only here for the build, skip down to Preparation. If you enjoy unnecessarily long origin stories, welcome.
Weeks ago, I found myself captivated by a strategically placed LEGO vending machine.
In an airport.
My youthful spirit sparked. A LEGO F1 McLaren for $30. In a vending machine! For both LEGO and an airport, that's actually a pretty good deal.
But I didn't buy it.
Fast forward to now.
I recently moved into a new apartment in Lincoln Park and have been trying to decorate the walls without making the place look like a college dorm. I wandered into Target for home décor, immediately got distracted by the LEGO aisle, and there they were again—the Formula 1 Speed Champions sets.
There's something incredibly satisfying about being an adult with purchasing power. You don't have to convince anyone. You just... execute.
All in favor say, "Aye."
So I bought the McLaren.
After building it, I realized it's a surprisingly cool display piece—a blocky little representation of thousands of engineers collectively deciding the best way to go very, very fast.
The only problem?
A shelf doesn't really do it justice.
Wanting something a bit more polished than my old "hang a poster and call it interior design" strategy, I decided to frame it instead.
But buying a cheap frame?
Absolutely not.
I own a 3D printer.
The entire thing fits on the print bed.
Time to get to work... or rather, time for the printer to get to work.
If you haven't explored Bambu Lab's MakerWorld yet, it's honestly incredible.
It's the closest we've ever been to materializing real, physical, useful products with two clicks and a little patience.
It's reaching that point where I'm starting to say, "Back in my day..."
Seriously though, growing up printing on a CR-10 meant:
- Manually tuning Cura profiles for every material
- Fighting failed prints constantly
- Watching the first layer like your life depended on it
- Sneakernet-ing G-code on SD cards
- Thinking OctoPrint was the greatest invention ever made
So yeah...
MakerWorld is getting ridiculously good.
I found a beautifully textured picture frame originally designed for 3D topographic maps. It wasn't intended for this project, but it looked perfect.
At first I considered simply hanging the LEGO car directly on the wall and placing a frame around it.
The problem?
That permanently commits the artwork to one spot.
I like rearranging things.
Instead, I wanted the entire display—including the car—to be one self-contained piece.
My first thought was suspending the car with clear fishing line, but that sounded like an exercise in frustration. The LEGO pieces could separate, tension would be annoying to adjust, and I'd inevitably spend hours trying to make it perfectly level.
Instead I shifted toward a plaque-style display.
I experimented with several backing materials:
- Cardstock
- Felt
- Acrylic
- Glass
- 3D printed panels
- Various plastics
Eventually I settled on matte white styrene.
It diffuses light nicely while still letting a little of the wall texture show through, which gives the finished piece a subtle depth.
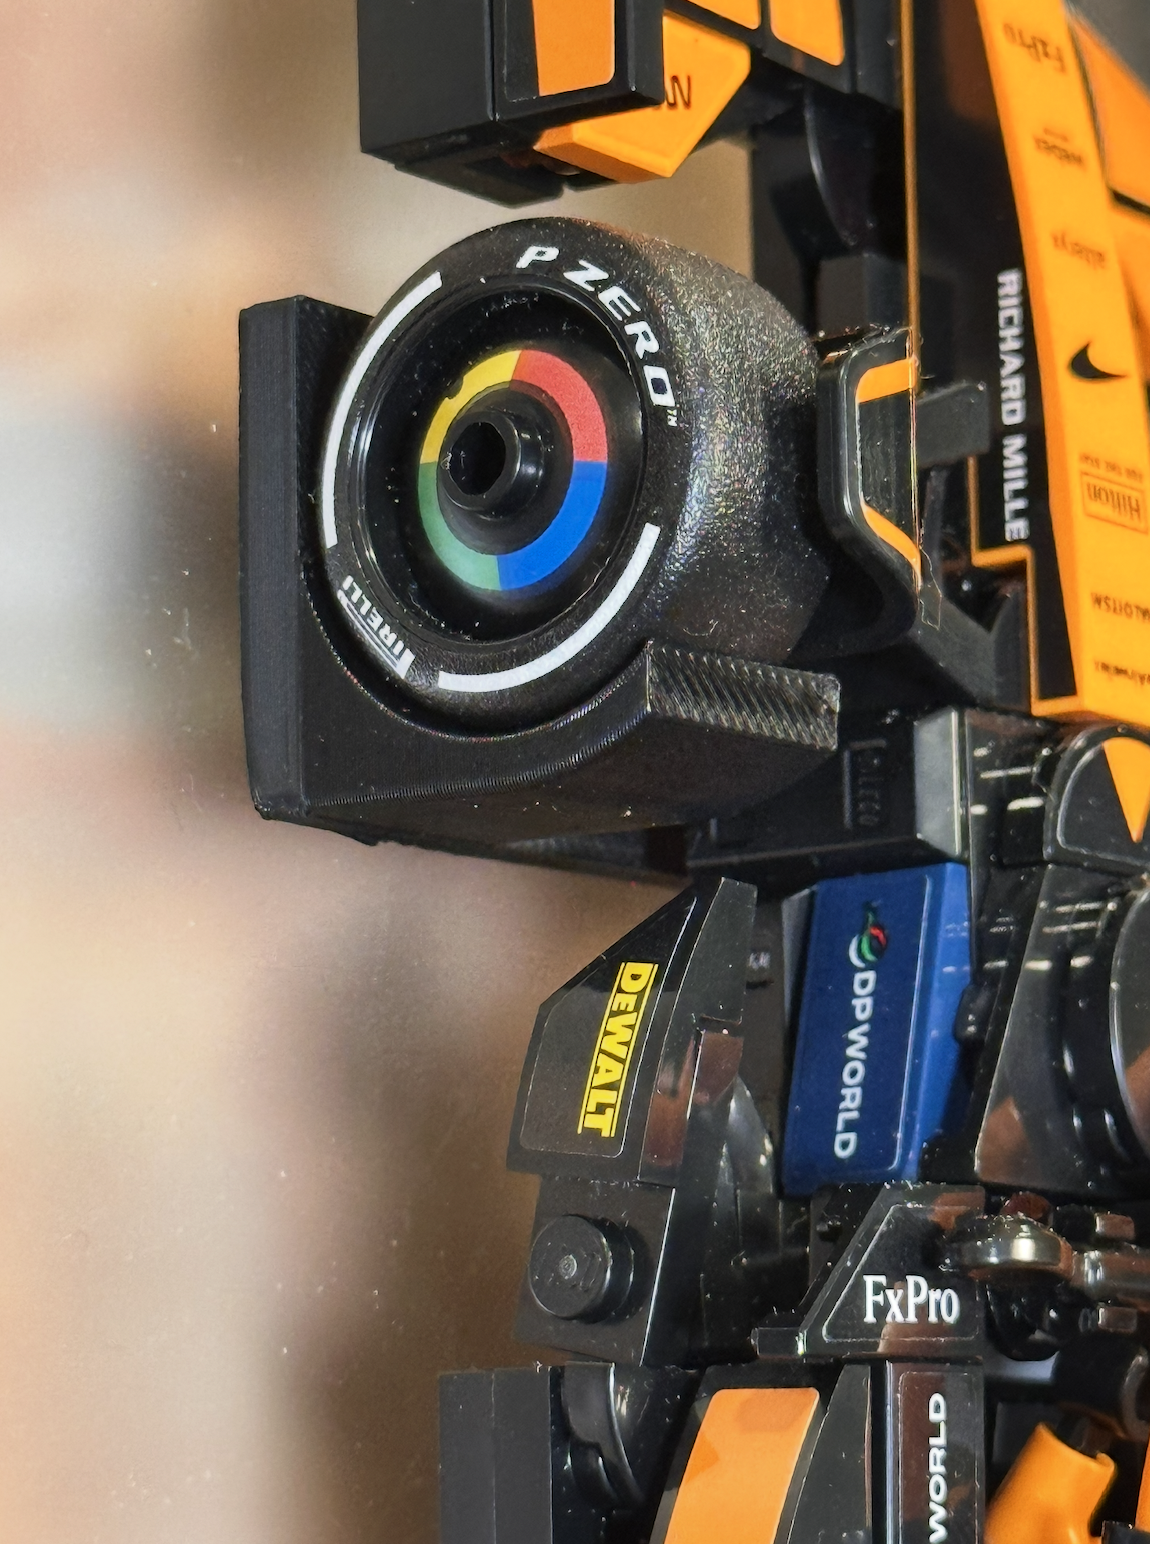
While browsing MakerWorld I also found a wall mount designed specifically for LEGO Speed Champions F1 cars.
Perfect.
The plan was set.
Time to build.
Preparation
Bill of Materials
- 1× 1/16" matte styrene sheet
- 1× 3D printed frame (approximately 200 × 160 mm)
- 1× LEGO Speed Champions F1 wall mount
- 1× LEGO F1 car
- 1× 3 mm countersunk wood screw
- Nail or 3M Command Strip
Tools
- Drill
- Drill bit
- Screwdriver
- Sharp utility knife, scoring tool, or box cutter
- Metal straight edge
- Clamps
Build
I downloaded both the LEGO wall mount and the wooden-textured frame from Bambu Lab's MakerWorld.
Although the frame was originally intended for 3D map artwork, it worked perfectly here.
I considered printing a solid backing, but I actually liked the subtle texture of the painted brick wall behind the matte styrene, so I let the material itself do some of the visual work.
I printed everything using Overture Black PLA.
The styrene sheet came from Blick Art Materials.
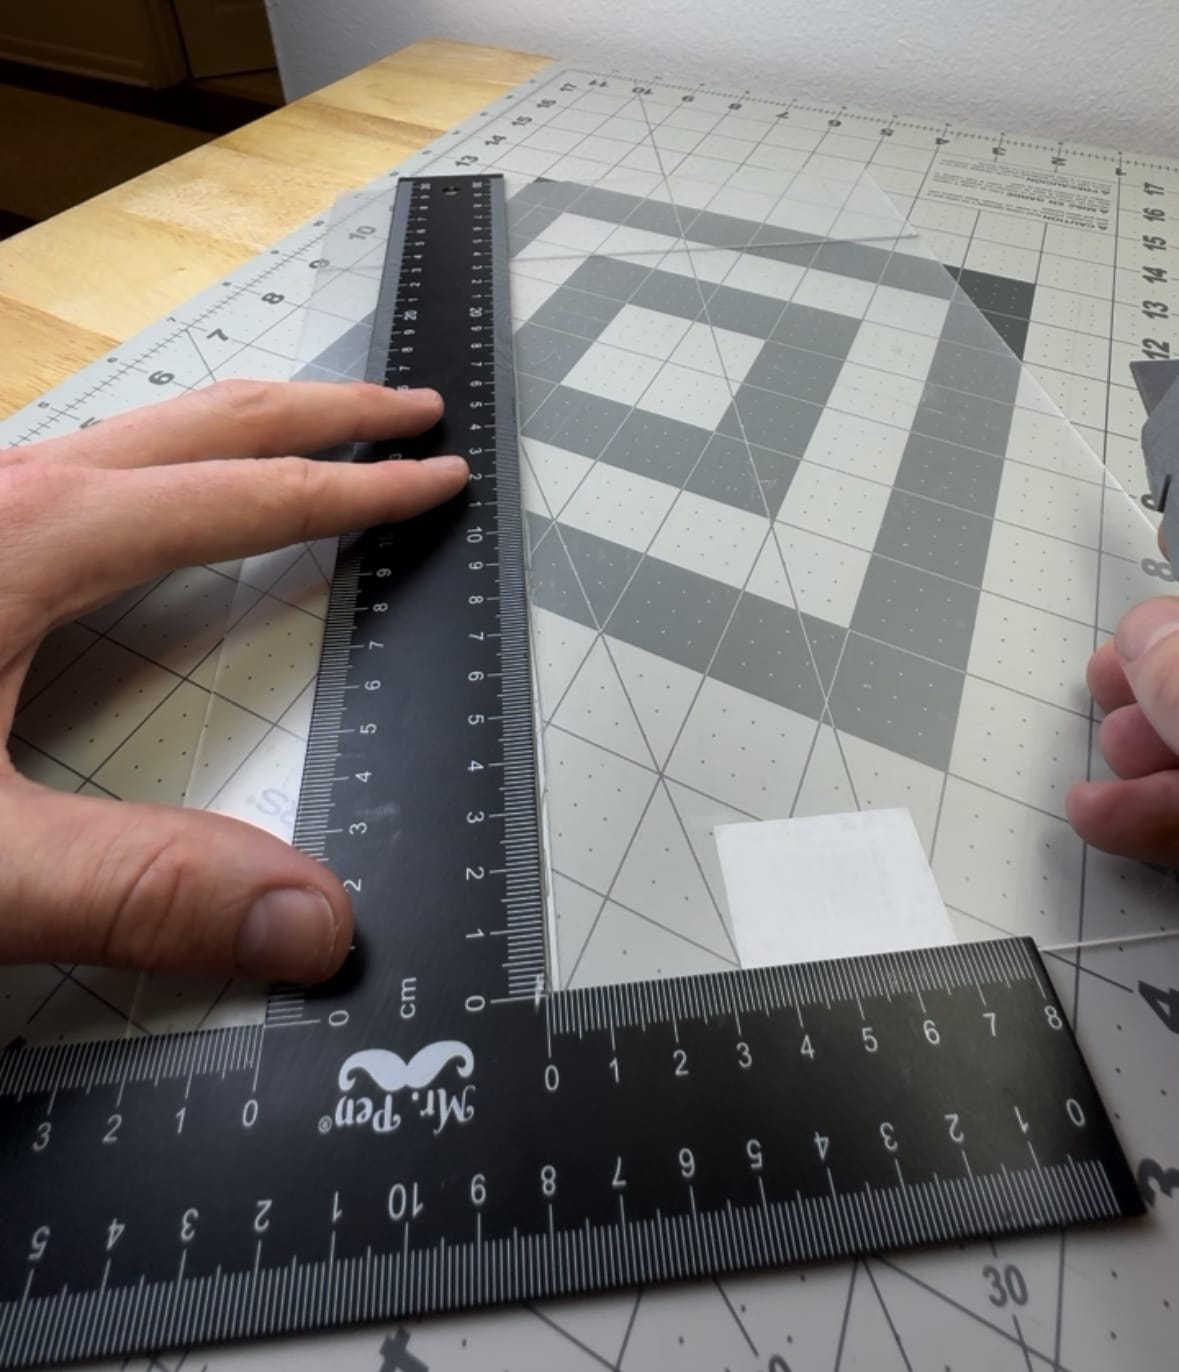
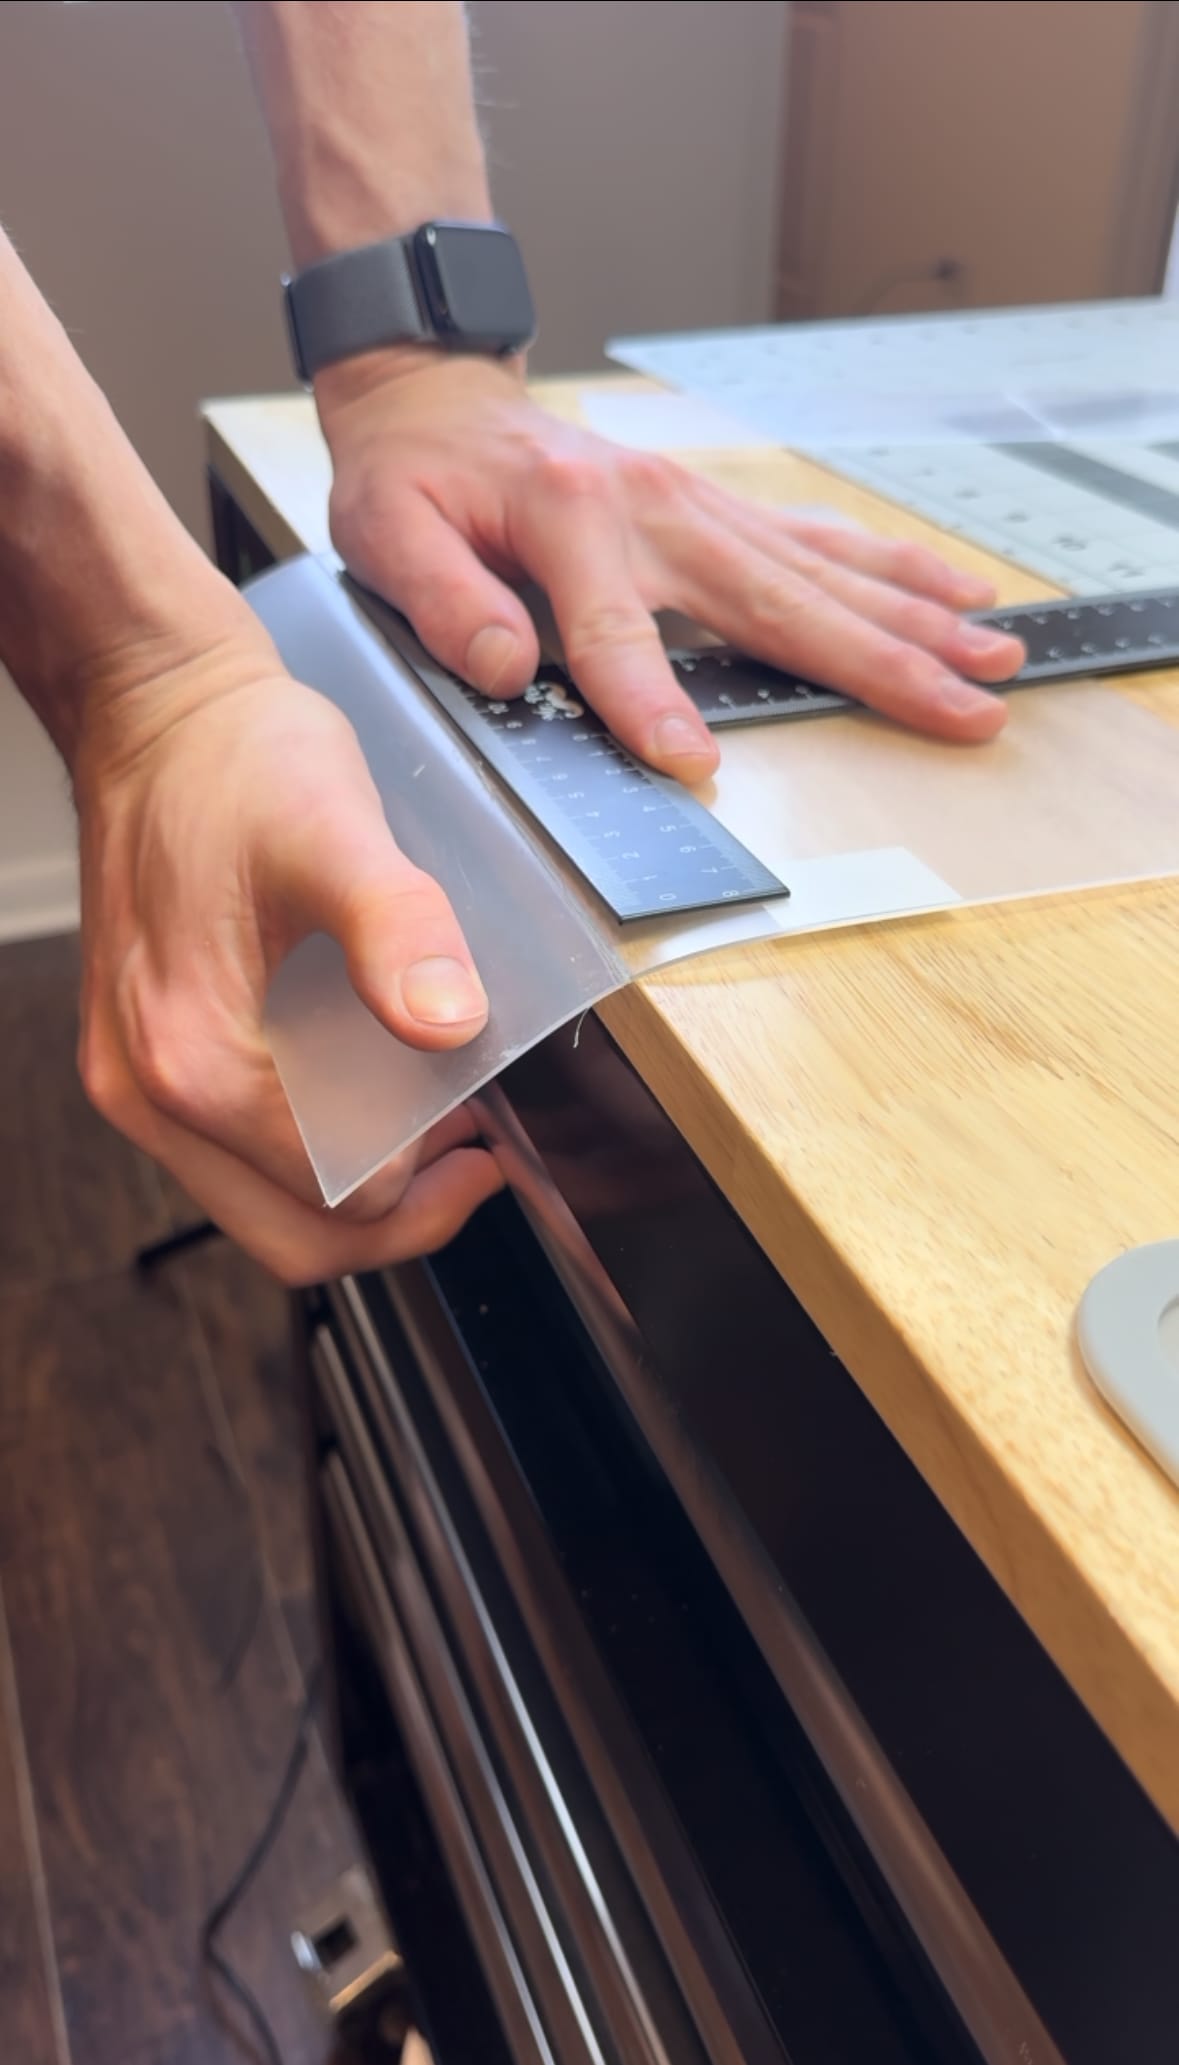
Cutting styrene is surprisingly straightforward.
Measure your dimensions carefully, clamp a metal straight edge securely to the work surface, and repeatedly score along the cut line.
Then score it again.
And again.
As my friend Charles always says:
Once you think you've scored it enough... score it a few more times.
After both sides are deeply scored, align the score line with the edge of a table and apply gentle downward pressure.
The sheet should snap cleanly.
Wear gloves and safety glasses if you're working with brittle plastics—small shards have a habit of launching themselves across the room.
I didn't score mine deeply enough and ended up with chipped edges.
Instead of starting over, I covered the perimeter with thin black gaffer's tape.
It blended nicely with the black frame and honestly looks intentional from more than a few feet away.
Sometimes good enough really is good enough.
Next came mounting the car.
Place the mount underneath the front wheels and center the car however you'd like.
The transparency of the styrene actually makes this pretty easy.
Once you're happy with the placement, carefully lift the LEGO car away while leaving the mount in position.
A tiny drop of super glue can help keep it from shifting while drilling.
Mark the mounting hole with a Sharpie.
Drill a hole approximately the diameter of the screw's inner shaft—not the threads.
That allows the threads to bite into the styrene and create a snug fit.
The countersink angle on the mount is roughly 45°, and a standard wood screw happened to match it perfectly.
Just don't overtighten it.
If you strip the plastic, you'll lose the interference fit.
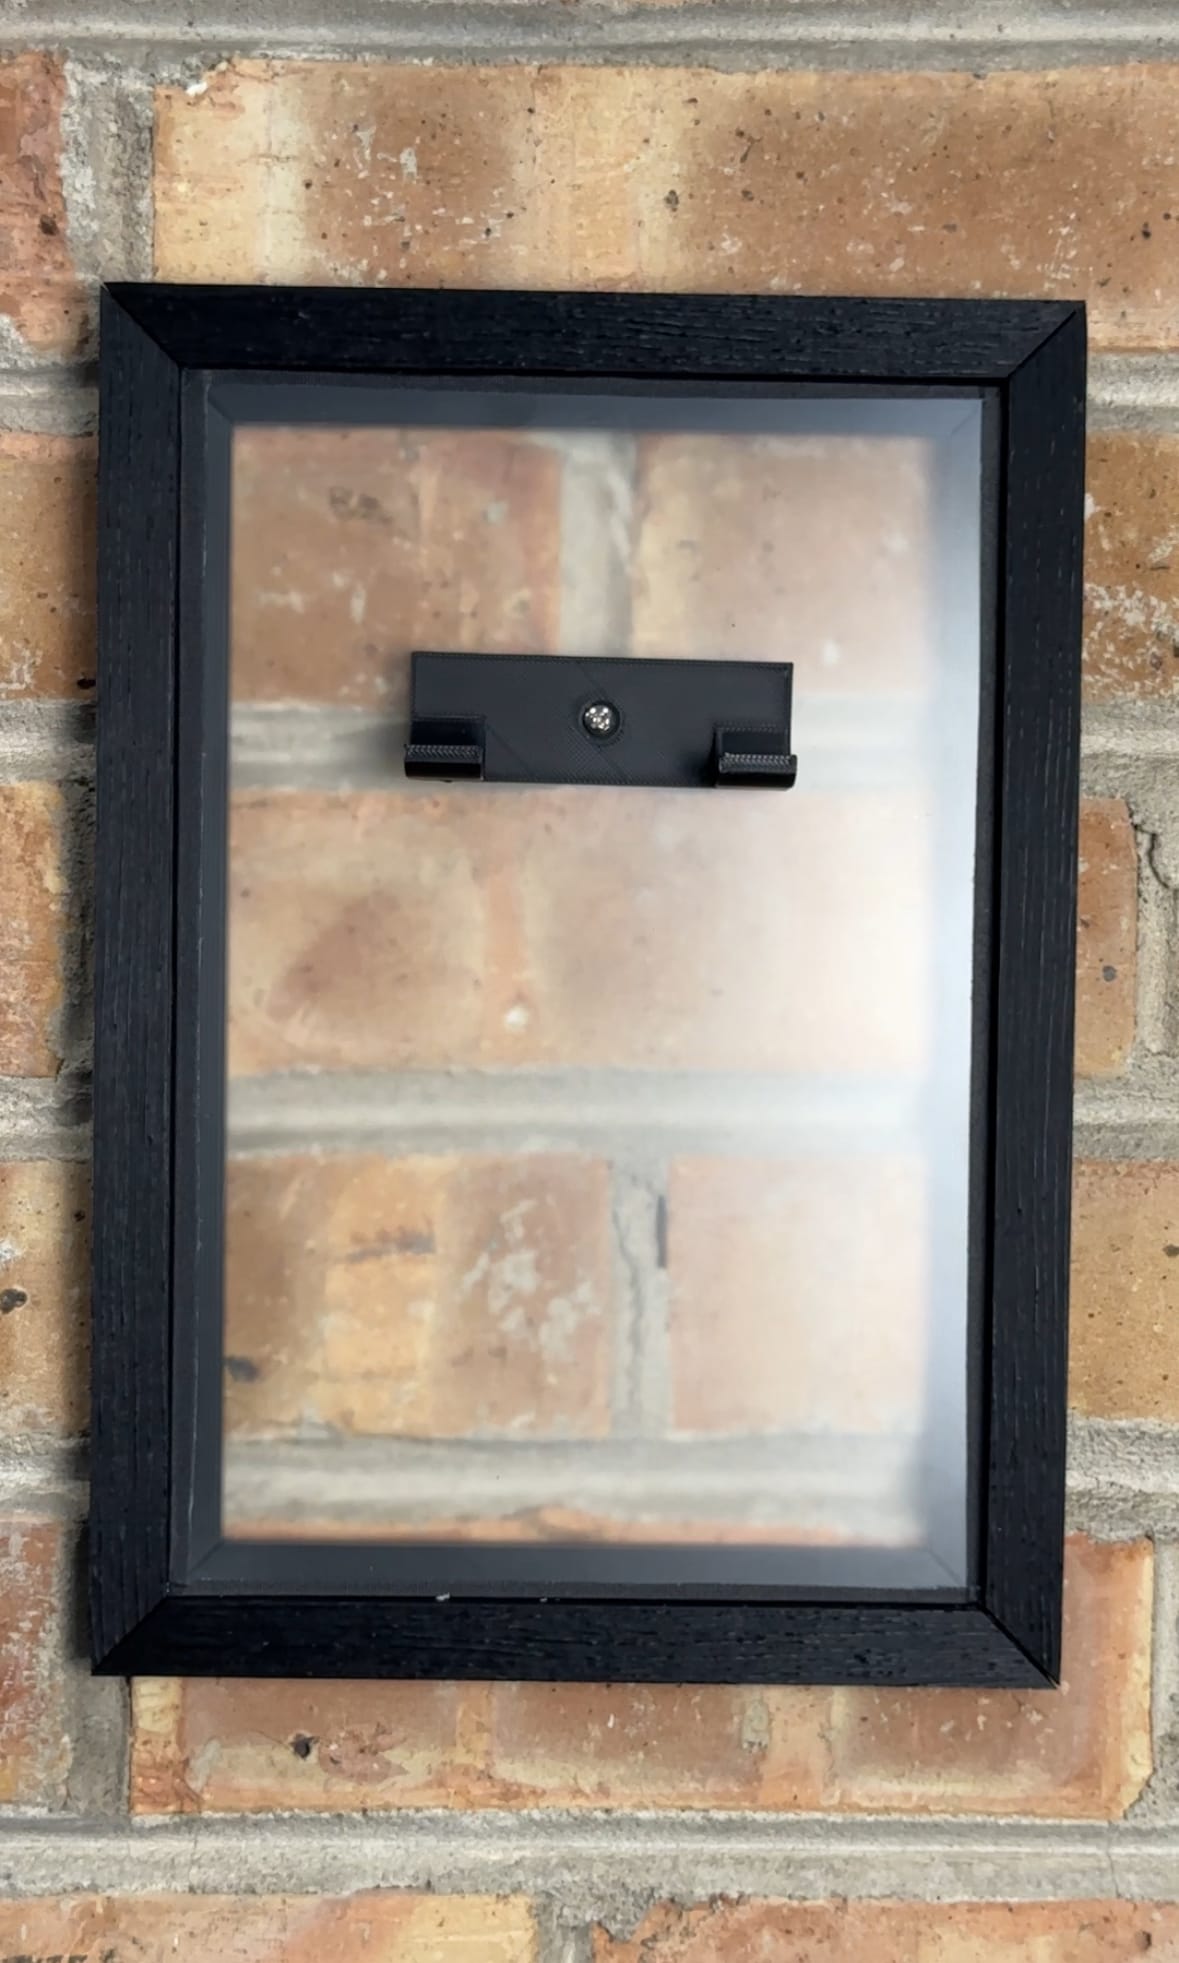
Once everything is assembled, simply hang it on the wall.
That's it.
A simple afternoon project that turns a shelf toy into something that actually feels like framed artwork.
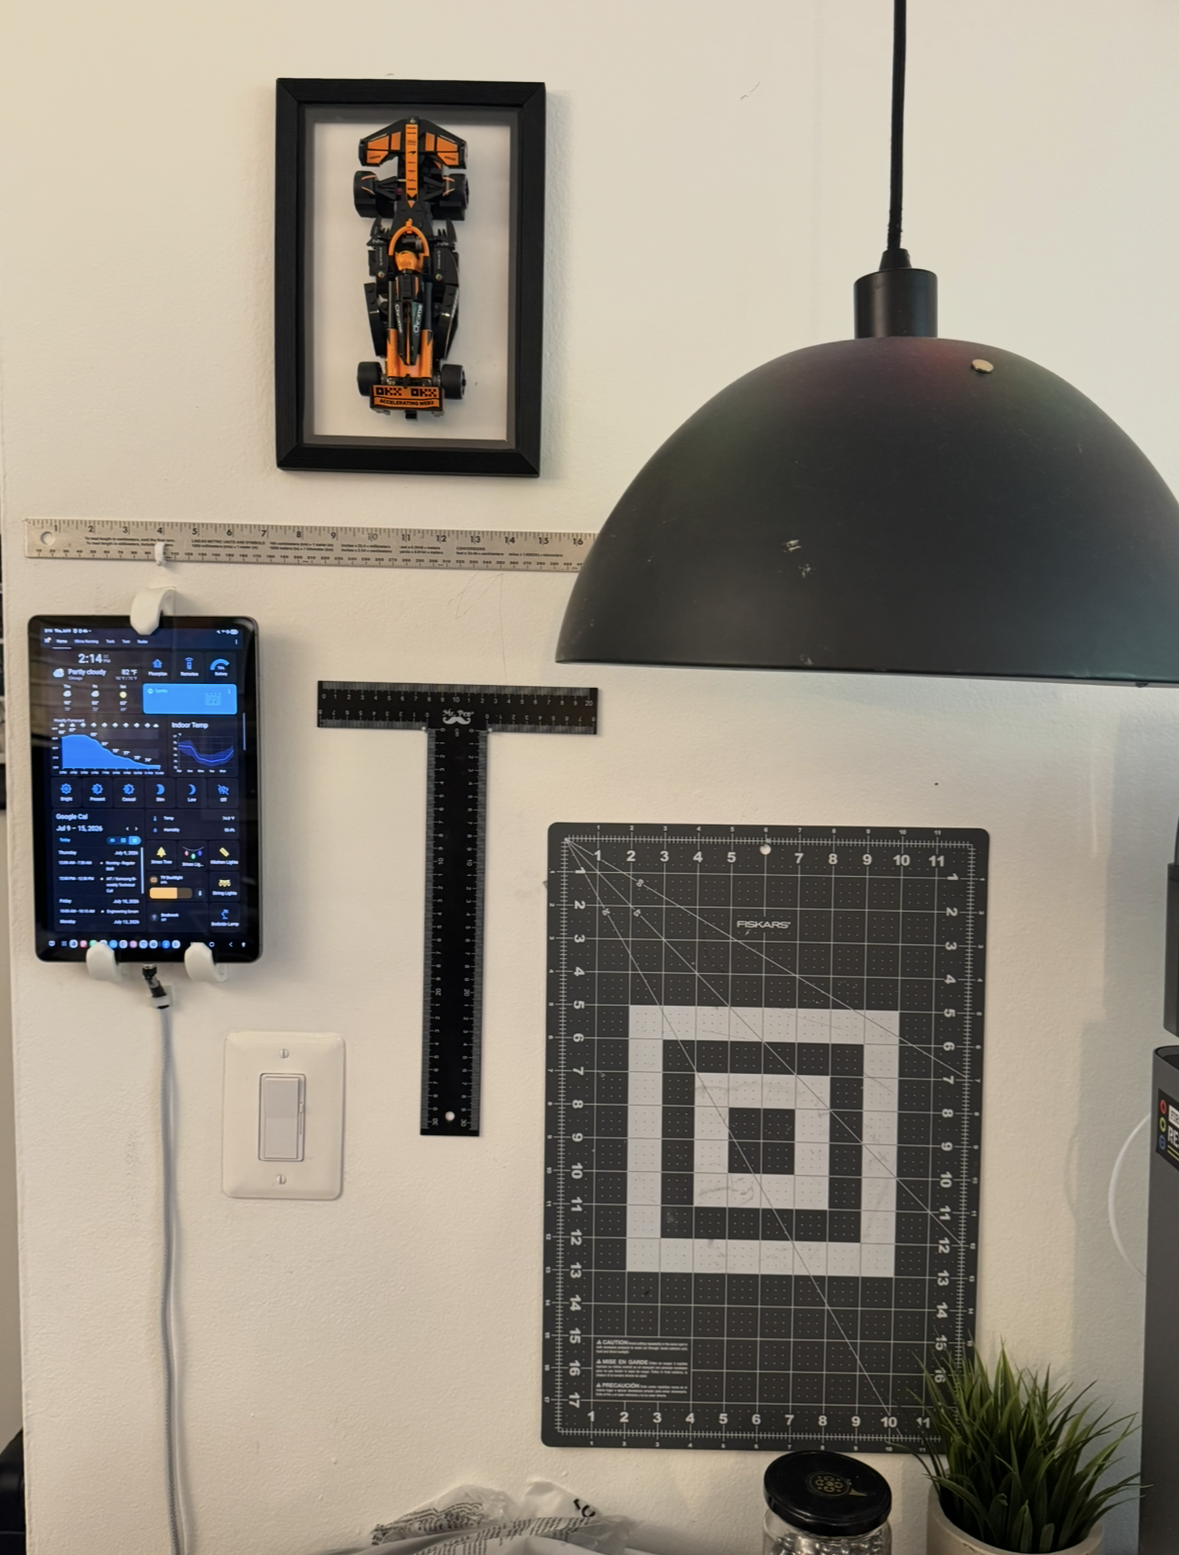
UPDATE: I have since relocated its home. I think I prefer this location.
Downloads
- 3MF: https://showcase.tomkauf.com/assets/projects/lego-f1-frame/files/Lego-F1-Frame-Wall-Art.3mf
- STL (Wall Mount): https://showcase.tomkauf.com/assets/projects/lego-f1-frame/files/Lego-F1-Speed-Champions-Car-Wall-Mount.stl
License Note: The original picture frame model isn't licensed for redistribution, so I'm linking to the original MakerWorld page rather than reposting the file.
— Tommy